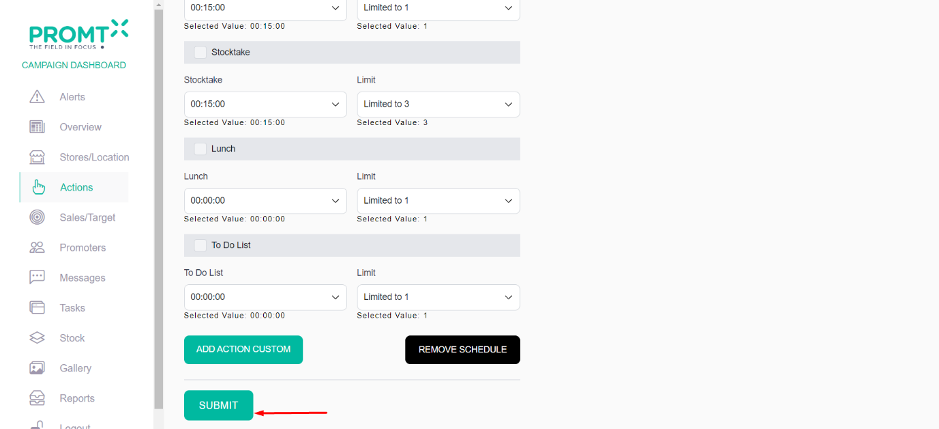
Users can configure campaign actions, schedule-level actions, and store-level actions for a campaign.
Follow the below steps to set campaign actions: Users can establish schedule-level and store-level actions similarly by navigating to the actions page. In schedule-level actions, users need to choose a schedule they created in the agency dashboard. For store-level actions, users must select a store added to the campaign. It’s important to note that only the added stores are visible in store-level actions, whereas all schedules from the agency dashboard are displayed in schedule-level actions.
Step 1: Click on Action
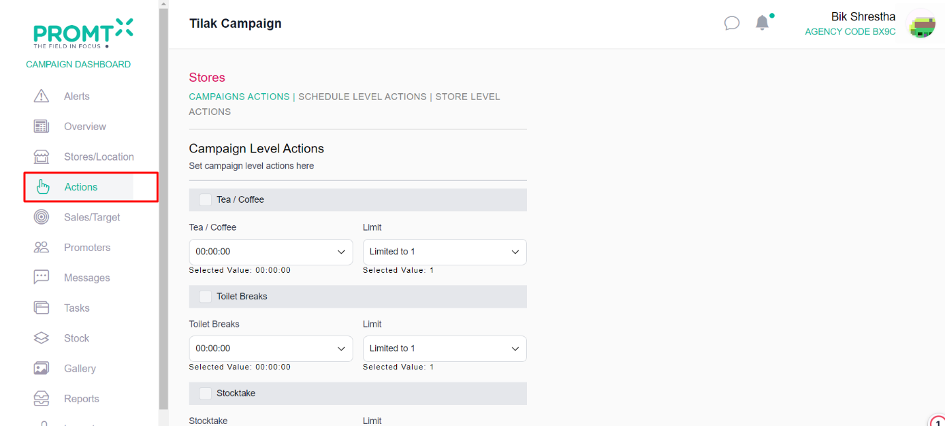
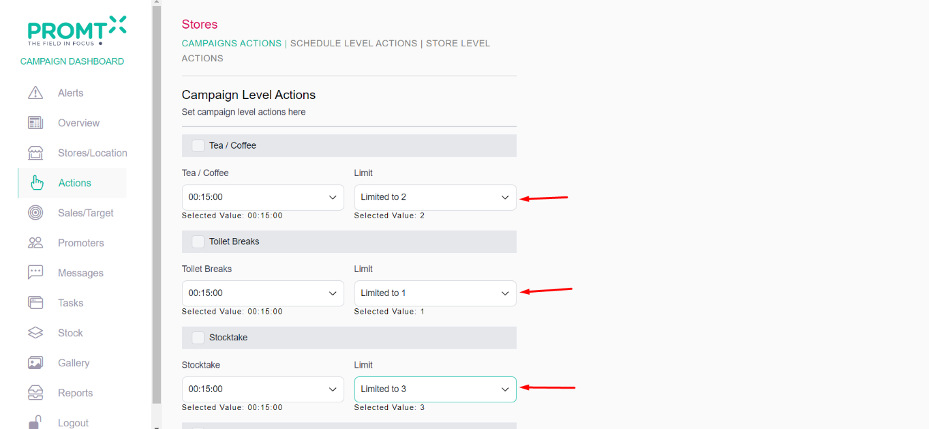
Step 2: Set the time and limit
Step 3: Click on Custom Action (If user want to add custom action)
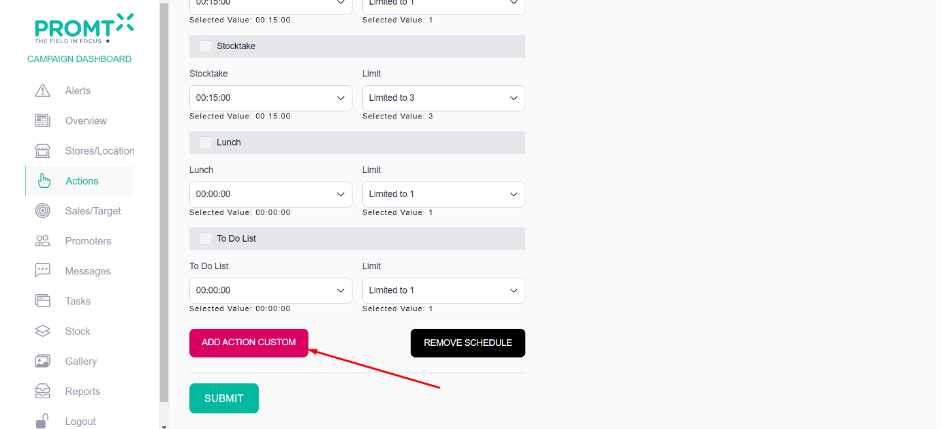
Step 4: Enter the Action name and select time and limit.
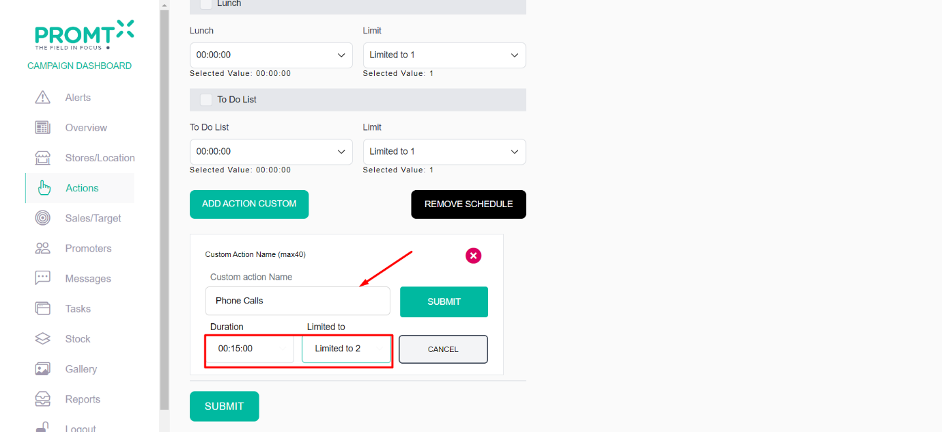
Step 5: Click on Submit
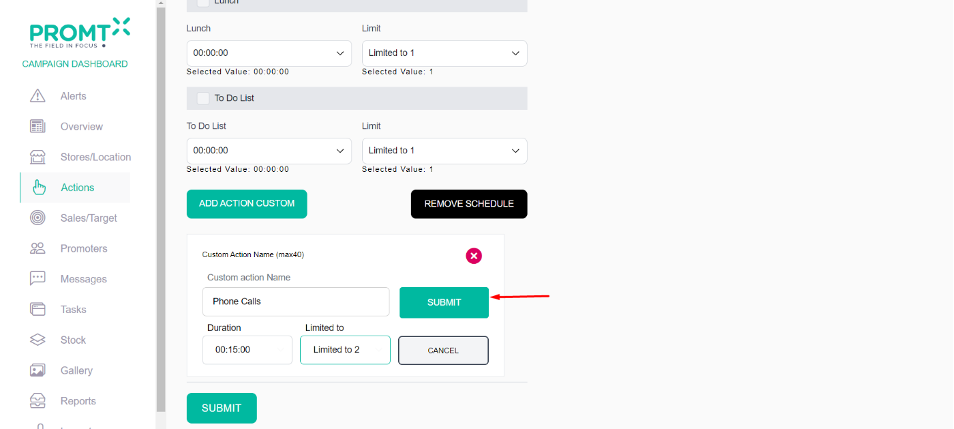
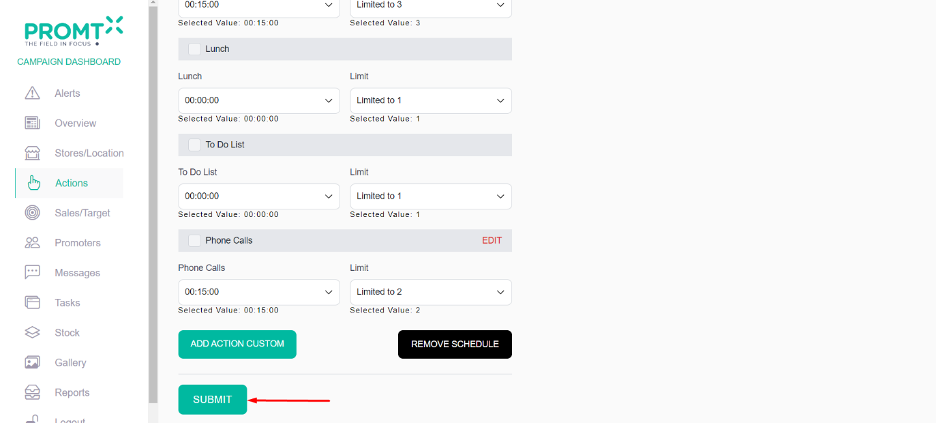
Step 6: Click on submit
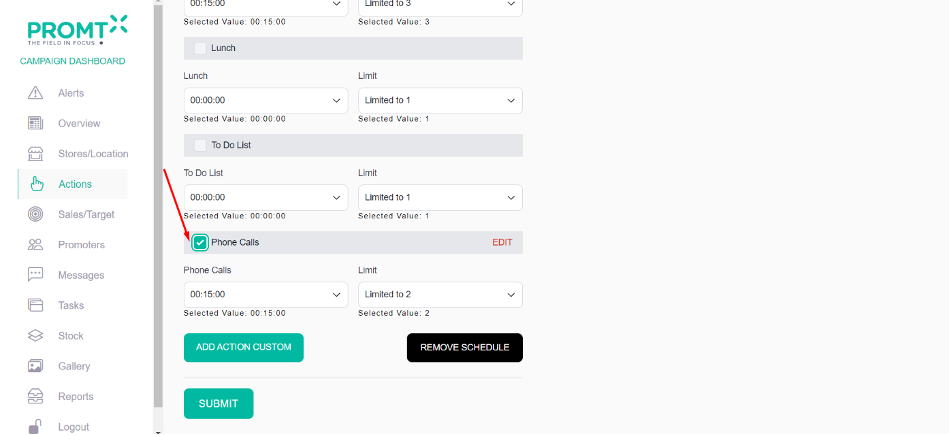
Step 7: Click on Action check box
To remove the action, users should follow the steps below:
Step 8: Click on Remove Schedule
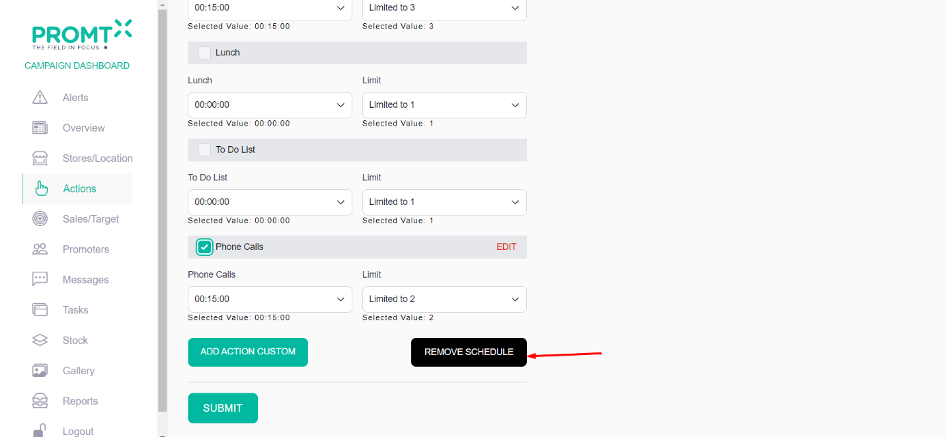
Step 9: Click on Submit