
To Add Schedules User should be on the Agency dashboard.
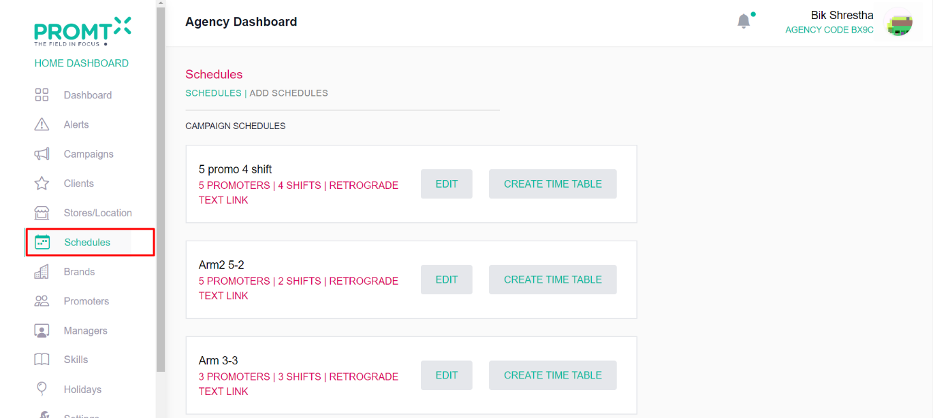
Step 1: Click on the Schedules from the side navbar.
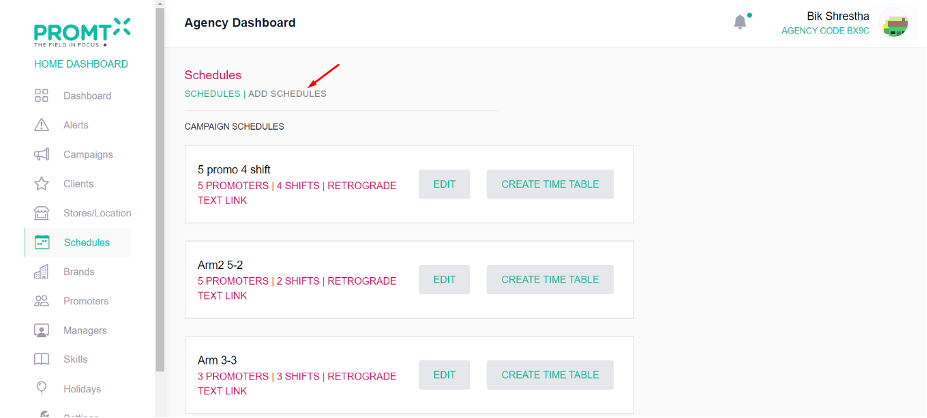
Step 2: Click on Add Schedules
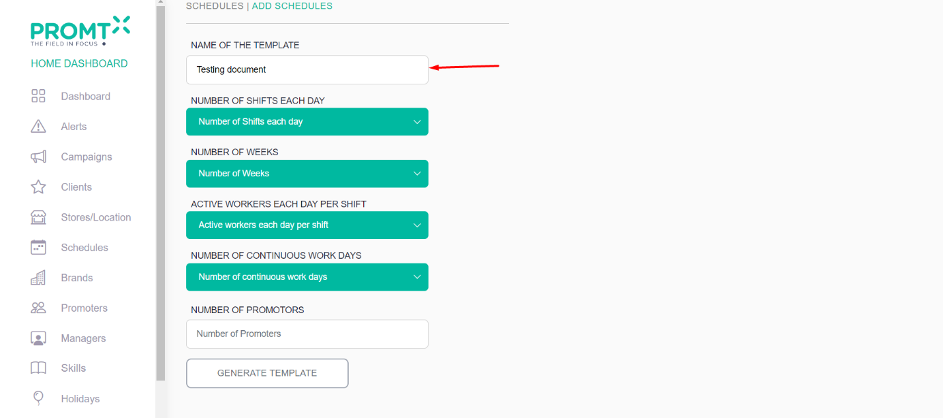
Step 3: Enter the template name on the input field
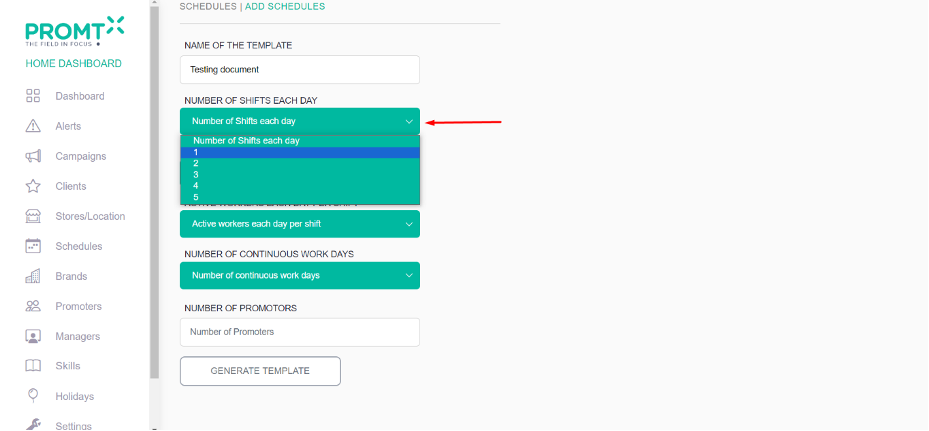
Step 4: Select the number of shift each day from the dropdown.
Step 5: Select the number of weeks from the dropdown.
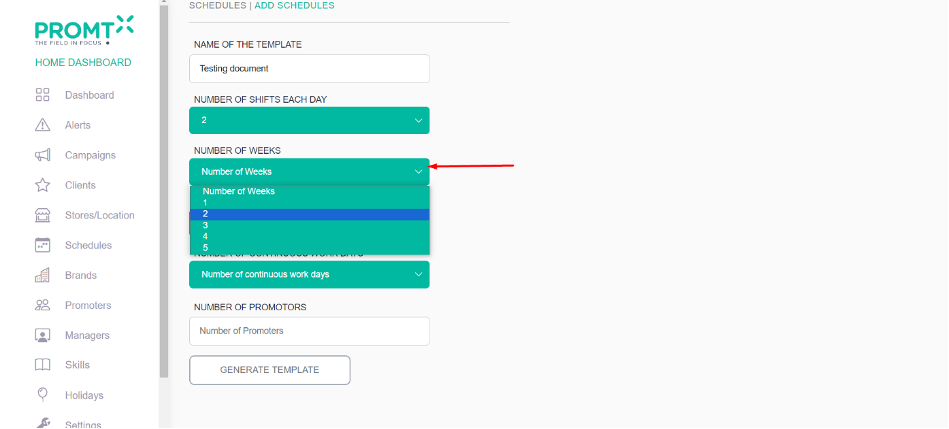
ep 6: Select the active workers each day per shift from the dropdown
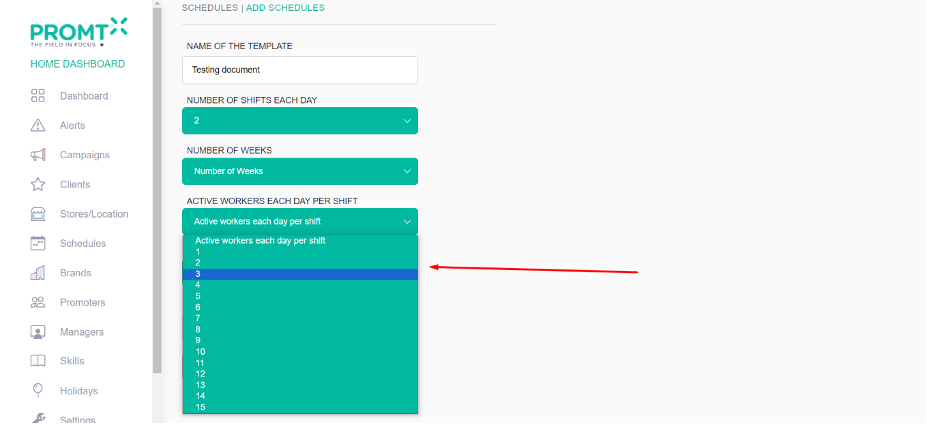
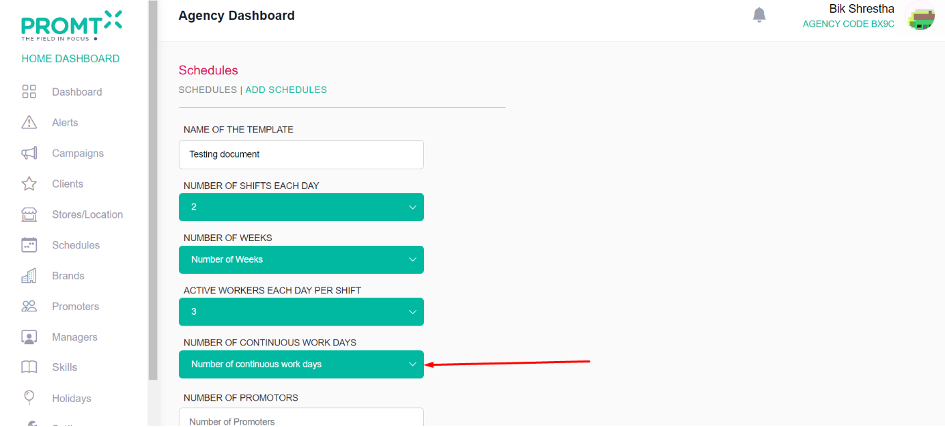
Step 7: Select the number of continuous work days from the dropdown.
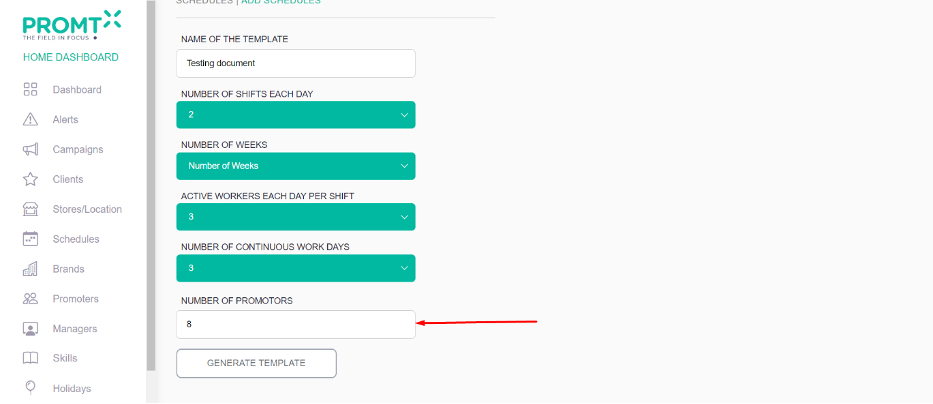
Step 8: Observe the number of promoter dropdown and click on generate template.
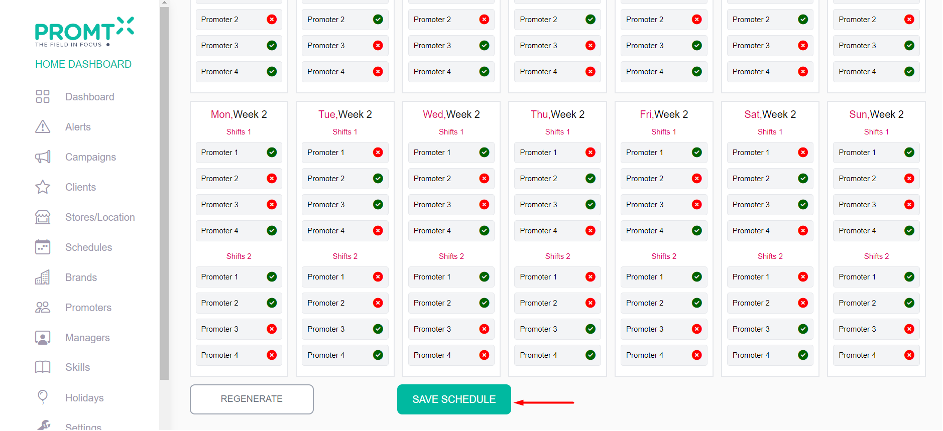
Step 9: Click on Save Schedules
Note: The user can regenerate the template multiple times during its creation by clicking the “Regenerate” button. However, once the template is created, the user is unable to regenerate or edit it. While creating the template, the user has the flexibility to customize it according to their preferences, whether they are scheduling specific days for promoters or specifying the days for leave.
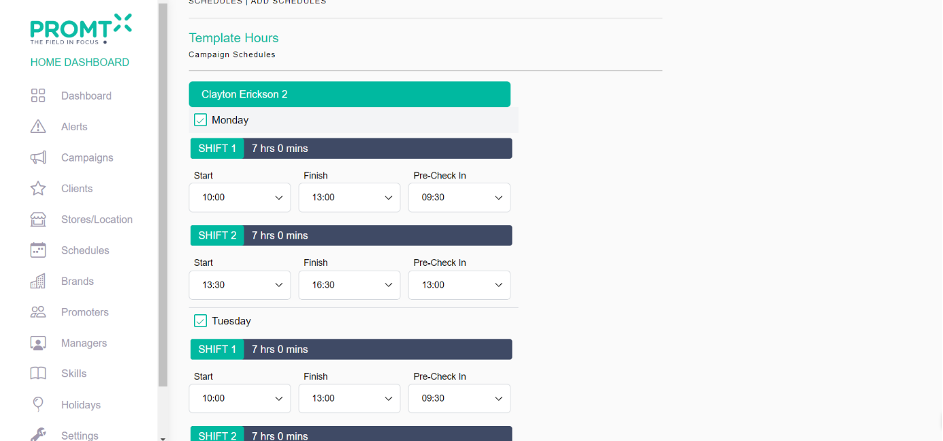
Step 10: Choose the daily time, start and end shifts, and pre-check-in.
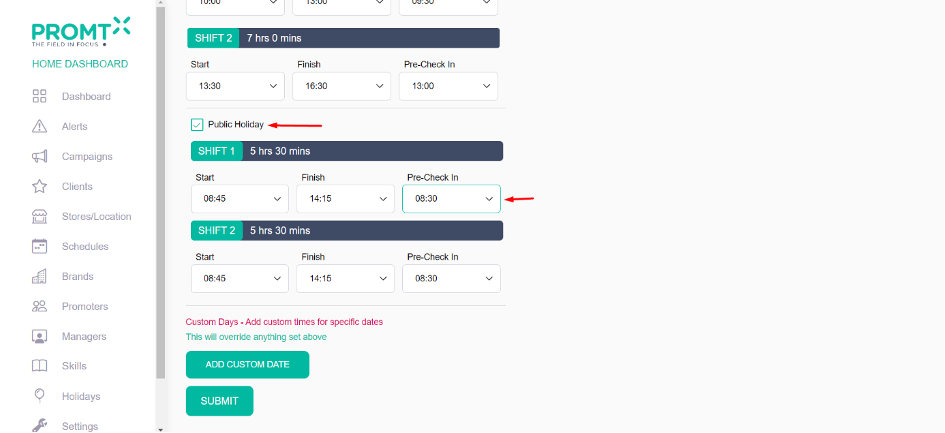
Step 11: Choose a public holiday and configure the timing.
Note: Users have the flexibility to set a specific time for public holidays if the campaign coincides with these days.
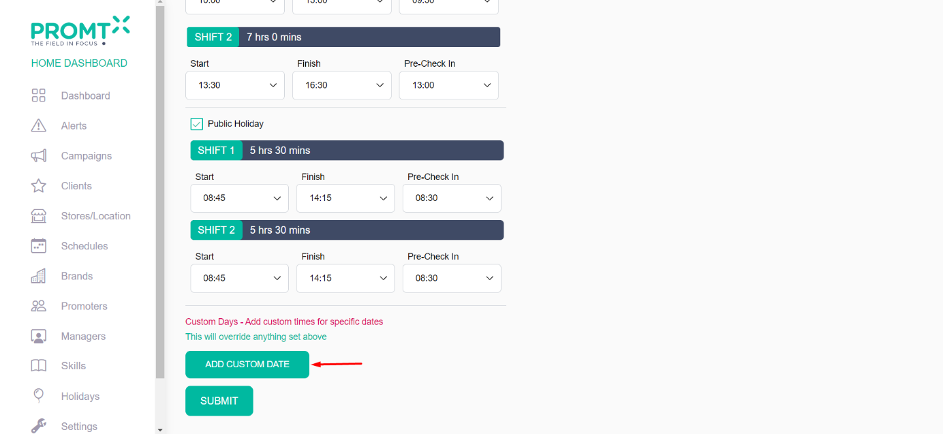
Step 12: Click on Add custom date
Note: Users have the flexibility to set a specific time for specific days.
Step 13: Select date and set time.
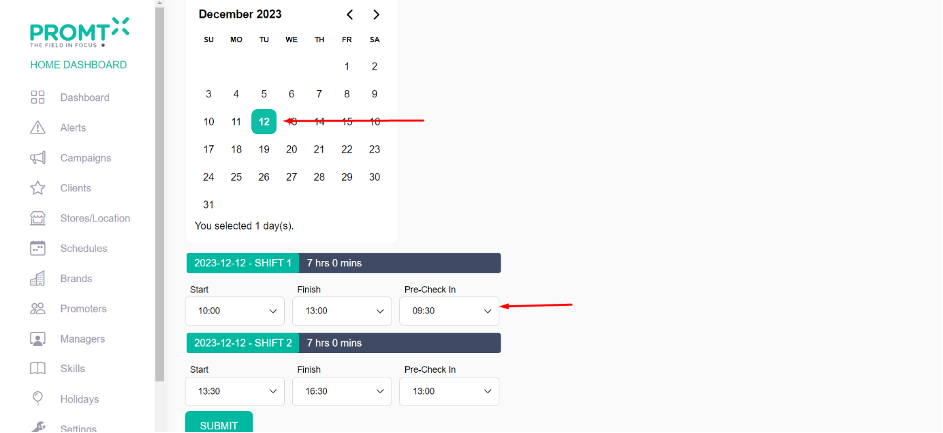
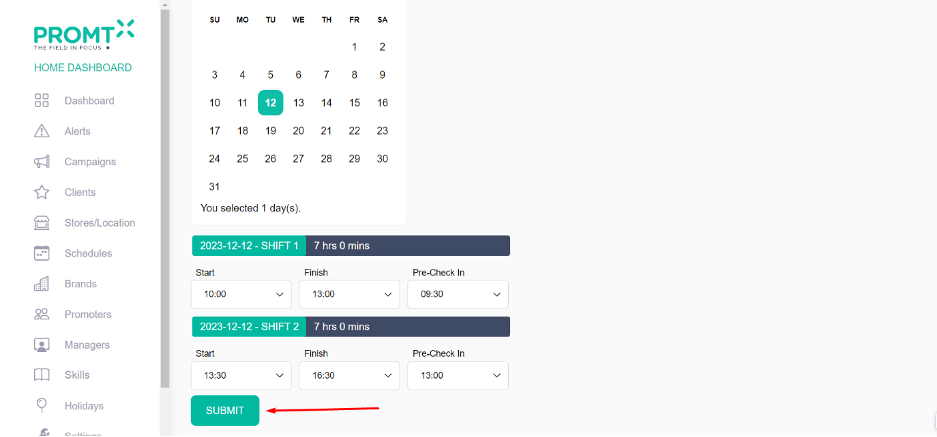
Step 14: Click on Submit
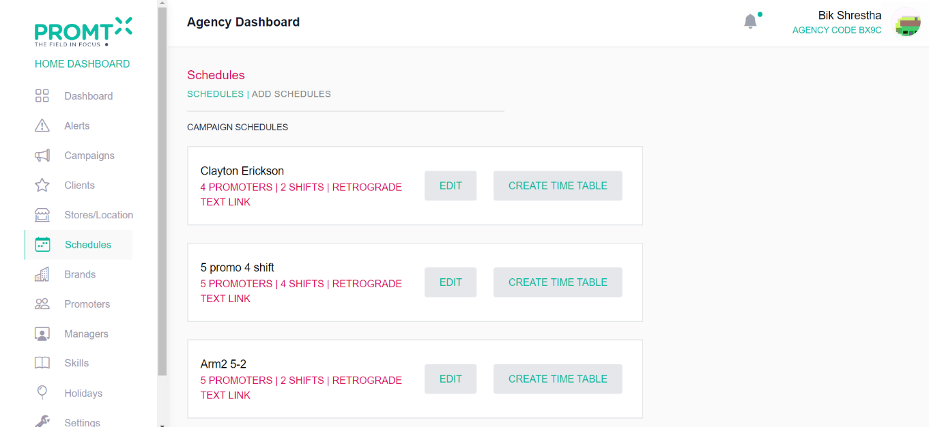
After creating the schedule, users can access and view it on the Schedule list page.
Important Note: To add a store, users must add a manager first, as the manager dropdown field is required on the ‘Add Store’ page of the agency dashboard. Consequently, the initial step involves adding a manager to the agency dashboard.